安装
go get github.com/spf13/viper
Demo快速上手
func main() {
    // 设置默认值
    viper.SetDefault("fileDir", "./")
    viper.SetConfigName("config")         // 配置文件名称中没有扩展名
    viper.SetConfigType("yaml")           // 如果配置文件没有扩展名,这需要配置此项
    viper.AddConfigPath("./")             // 查找配置文件所在路径
    viper.AddConfigPath("$HOME/.appname") // 多次调用以添加多个搜索路径
    viper.AddConfigPath(".")              // 还可以在工作目录中添加配置
    err := viper.ReadInConfig()           // 查找并读取配置文件
    if err != nil {
        //panic(fmt.Errorf("fatal error config file:%s \n", err))
        if _, ok := err.(viper.ConfigFileNotFoundError); ok { // 类型断言,看是不是文件没找到的错误
            // 配置文件找不到
        } else {
            // 其他错误

        }
    }
    // 从配置文件读取值
    resp := viper.Get("resp")
    fmt.Println(resp)

    // 访问嵌套的值(Viper可以通过传入.分隔的路径来访问嵌套字段)
    url := viper.GetStringMap("data.list")
    fmt.Println(url)

    // 访问嵌套的值
    url1 := viper.GetString("data.list.url1")
    fmt.Println(url1)

    // 实时监控配置文件的变化,有变化就执行回调函数
    viper.WatchConfig() // 实时监控配置文件的变化
    viper.OnConfigChange(func(e fsnotify.Event) {
        // 配置文件变化后回调用的回调函数
        fmt.Println("config file changed:", e.Name)
    })
}
// json配置文件
{
  "resp": {
    "msg": "success",
    "code": 200
  },
  "data": {
    "list": {
      "url1": "http://api.devilwst.top/",
      "url2": "http://bbs.devilwst.top/"
    },
    "inf": {
      "sign": "02cbahihjia45rt8yumlz",
      "d": 2112
    }
  }
}
// 结构体变量保存配置信息
type Config struct {
    Port    int    `mapstructure:"port"`
    Version string `mapstructure:"version"`
}

var Conf = new(Config)

func main() {
    viper.SetConfigFile("./conf/config.yaml") // 指定配置文件路径
    err := viper.ReadInConfig()               // 读取配置信息
    if err != nil {                           // 读取配置信息失败
        panic(fmt.Errorf("Fatal error config file: %s \n", err))
    }
    // 将读取的配置信息保存至全局变量Conf
    if err := viper.Unmarshal(Conf); err != nil {
        panic(fmt.Errorf("unmarshal conf failed, err:%s \n", err))
    }
}
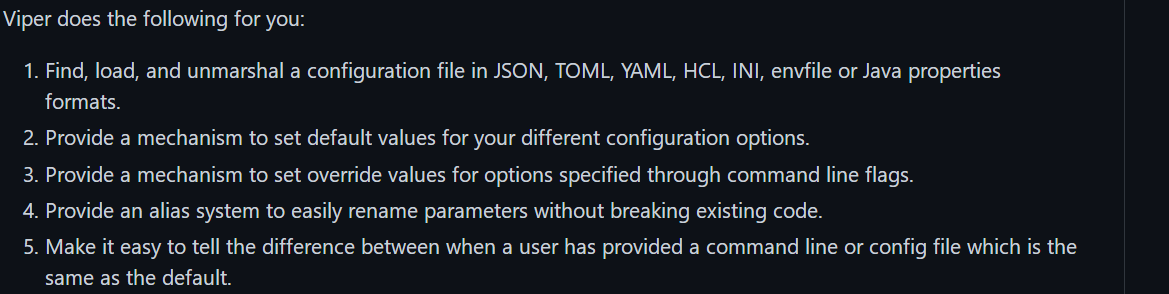
Viper生平简介

Viper配置的键(Key)是大小写不敏感的
把值存入viper
建立默认值
viper.SetDefault("ContentDir", "content")
viper.SetDefault("LayoutDir", "layouts")
viper.SetDefault("Taxonomies", map[string]string{"tag": "tags", "category": "categories"})
读取配置文件
Viper requires minimal configuration so it knows where to look for config files. Viper supports JSON, TOML, YAML, HCL, INI, envfile and Java Properties files. Viper can search multiple paths, but currently a single Viper instance only supports a single configuration file. Viper does not default to any configuration search paths leaving defaults decision to an application.Viper需要最少知道在哪里查找配置文件的配置。Viper支持JSON、TOML、YAML、HCL、envfile和Java properties格式的配置文件。Viper可以搜索多个路径,但目前单个Viper实例只支持单个配置文件。Viper不默认任何配置搜索路径,将默认决策留给应用程序。
viper.SetConfigFile("./config.yaml") // 指定配置文件路径
viper.SetConfigName("config") // 配置文件名称(无扩展名)
viper.SetConfigType("yaml") // 如果配置文件的名称中没有扩展名,则需要配置此项
viper.AddConfigPath("/etc/appname/")   // 查找配置文件所在的路径
viper.AddConfigPath("$HOME/.appname")  // 多次调用以添加多个搜索路径
viper.AddConfigPath(".")               // 还可以在工作目录中查找配置
err := viper.ReadInConfig() // 查找并读取配置文件
if err != nil { // 处理读取配置文件的错误
    panic(fmt.Errorf("Fatal error config file: %s \n", err))
}
当加载配置文件出错时, viper提功了如下 的错误处理方案
if err := viper.ReadInConfig(); err != nil {
    if _, ok := err.(viper.ConfigFileNotFoundError); ok {
        // 配置文件未找到错误;如果需要可以忽略
    } else {
        // 配置文件被找到,但产生了另外的错误
    }
}
// 配置文件找到并成功解析
NOTE [since 1.6]: You can also have a file without an extension and specify the format programmaticaly. For those configuration files that lie in the home of the user without any extension like .bashrc
注意[自1.6起]: 你也可以有不带扩展名的文件,并以编程方式指定其格式。对于位于用户$HOME目录中的配置文件没有任何扩展名,如.bashrc。
写入配置文件
- WriteConfig – 将当前的viper配置写入预定义的路径并覆盖(如果存在的话)。如果没有预定义的路径,则报错。
- SafeWriteConfig – 将当前的viper配置写入预定义的路径。如果没有预定义的路径,则报错。如果存在,将不会覆盖当前的配置文件。
- WriteConfigAs – 将当前的viper配置写入给定的文件路径。将覆盖给定的文件(如果它存在的话)。
- SafeWriteConfigAs – 将当前的viper配置写入给定的文件路径。不会覆盖给定的文件(如果它存在的话)。
标记为safe的所有方法都不会覆盖任何文件,而是直接创建(如果不存在),而默认行为是创建或截断。
viper.WriteConfig() // 将当前配置写入“viper.AddConfigPath()”和“viper.SetConfigName”设置的预定义路径
viper.SafeWriteConfig()
viper.WriteConfigAs("/path/to/my/.config")
viper.SafeWriteConfigAs("/path/to/my/.config") // 因为该配置文件写入过,所以会报错
viper.SafeWriteConfigAs("/path/to/my/.other_config")
实时监控配置文件
Simply tell the viper instance to watchConfig. Optionally you can provide a function for Viper to run each time a change occurs.
只需告诉viper实例watchConfig。可选地,你可以为Viper提供一个回调函数,以便在每次发生更改时运行。
viper.WatchConfig()
viper.OnConfigChange(func(e fsnotify.Event) {
  // 配置文件发生变更之后会调用的回调函数
    fmt.Println("Config file changed:", e.Name)
})
从io.Reader读取配置文件
Viper预先定义了许多配置源,如文件、环境变量、标志和远程K/V存储,但你还可以实现自己所需的配置源并将其提供给viper。
viper.SetConfigType("yaml") // or viper.SetConfigType("YAML")

// any approach to require this configuration into your program.
var yamlExample = []byte(`
Hacker: true
name: steve
hobbies:
- skateboarding
- snowboarding
- go
clothing:
  jacket: leather
  trousers: denim
age: 35
eyes : brown
beard: true
`)

viper.ReadConfig(bytes.NewBuffer(yamlExample))
viper.Get("name") // this would be "steve"
覆盖设置
viper.Set("Verbose", true)
viper.Set("LogFile", LogFile)
注册和使用别名
viper.RegisterAlias("loud", "Verbose")  // 注册别名(此处loud和Verbose建立了别名)

viper.Set("verbose", true) // 结果与下一行相同
viper.Set("loud", true)   // 结果与前一行相同

viper.GetBool("loud") // true
viper.GetBool("verbose") // true
使用环境变量
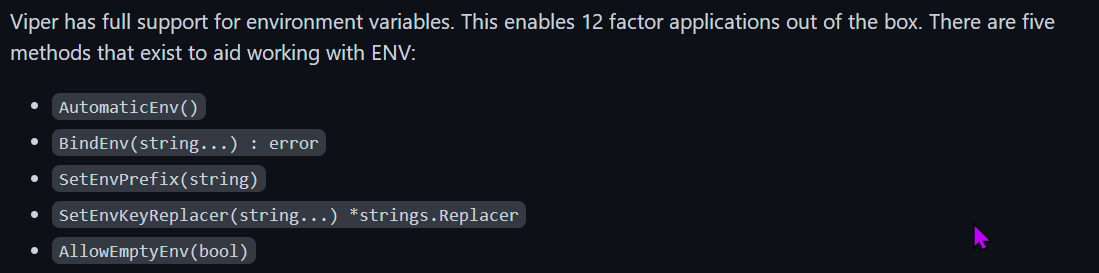
– AutomaticEnv()
– BindEnv(string...) : error
– SetEnvPrefix(string)
– SetEnvKeyReplacer(string...) *strings.Replacer
– AllowEmptyEnv(bool)
使用ENV变量时,务必要意识到Viper将ENV变量视为区分大小写。
Viper提供了一种机制来确保ENV变量是惟一的。通过使用SetEnvPrefix,你可以告诉Viper在读取环境变量时使用前缀。BindEnv和AutomaticEnv都将使用这个前缀。
BindEnv使用一个或两个参数。第一个参数是键名称,第二个是环境变量的名称。环境变量的名称区分大小写。如果没有提供ENV变量名,那么Viper将自动假设ENV变量与以下格式匹配:前缀+ “_” +键名全部大写。当你显式提供ENV变量名(第二个参数)时,它 不会 自动添加前缀。例如,如果第二个参数是“id”,Viper将查找环境变量“ID”。
在使用ENV变量时,需要注意的一件重要事情是,每次访问该值时都将读取它。Viper在调用BindEnv时不固定该值。
AutomaticEnv是一个强大的助手,尤其是与SetEnvPrefix结合使用时。调用时,Viper会在发出viper.Get请求时随时检查环境变量。它将应用以下规则。它将检查环境变量的名称是否与键匹配(如果设置了EnvPrefix)。
SetEnvKeyReplacer允许你使用strings.Replacer对象在一定程度上重写 Env 键。如果你希望在Get()调用中使用-或者其他什么符号,但是环境变量里使用_分隔符,那么这个功能是非常有用的。可以在viper_test.go中找到它的使用示例。
或者,你可以使用带有NewWithOptions工厂函数的EnvKeyReplacer。与SetEnvKeyReplacer不同,它接受StringReplacer接口,允许你编写自定义字符串替换逻辑。
默认情况下,空环境变量被认为是未设置的,并将返回到下一个配置源。若要将空环境变量视为已设置,请使用AllowEmptyEnv方法。
SetEnvPrefix("spf") // 将自动转为大写
BindEnv("id")

os.Setenv("SPF_ID", "13") // 通常是在应用程序之外完成的

id := Get("id") // 13
使用Flags
Viper 具有绑定到标志的能力。具体来说,Viper支持Cobra库中使用的Pflag。
与BindEnv类似,该值不是在调用绑定方法时设置的,而是在访问该方法时设置的。这意味着你可以根据需要尽早进行绑定,即使在init()函数中也是如此。
对于单个标志,BindPFlag()方法提供此功能。
例如:
serverCmd.Flags().Int("port", 1138, "Port to run Application server on")
viper.BindPFlag("port", serverCmd.Flags().Lookup("port"))
你还可以绑定一组现有的pflags (pflag.FlagSet):
举个例子:
pflag.Int("flagname", 1234, "help message for flagname")

pflag.Parse()
viper.BindPFlags(pflag.CommandLine)

i := viper.GetInt("flagname") // 从viper而不是从pflag检索值
在 Viper 中使用 pflag 并不阻碍其他包中使用标准库中的 flag 包。pflag 包可以通过导入这些 flags 来处理flag包定义的flags。这是通过调用pflag包提供的便利函数AddGoFlagSet()来实现的。
例如:
package main

import (
    "flag"
    "github.com/spf13/pflag"
)

func main() {

    // 使用标准库 "flag" 包
    flag.Int("flagname", 1234, "help message for flagname")

    pflag.CommandLine.AddGoFlagSet(flag.CommandLine)
    pflag.Parse()
    viper.BindPFlags(pflag.CommandLine)

    i := viper.GetInt("flagname") // 从 viper 检索值

    ...
}
flag接口
如果不使用Pflag,Viper 提供了两个Go接口来绑定其他 flag 系统。
FlagValue表示单个flag。下面这是一个关于如何实现这个接口的非常简单的例子:
type myFlag struct {}
func (f myFlag) HasChanged() bool { return false }
func (f myFlag) Name() string { return "my-flag-name" }
func (f myFlag) ValueString() string { return "my-flag-value" }
func (f myFlag) ValueType() string { return "string" }
一旦你的 flag 实现了这个接口,你可以很方便地告诉Viper绑定它:
viper.BindFlagValue("my-flag-name", myFlag{})
FlagValueSet代表一组 flags 。这是一个关于如何实现这个接口的非常简单的例子:
type myFlagSet struct {
    flags []myFlag
}

func (f myFlagSet) VisitAll(fn func(FlagValue)) {
    for _, flag := range flags {
        fn(flag)
    }
}
一旦你的flag set实现了这个接口,你就可以很方便地告诉Viper绑定它:
fSet := myFlagSet{
    flags: []myFlag{myFlag{}, myFlag{}},
}
viper.BindFlagValues("my-flags", fSet)
远程Key/Value存储
在Viper中启用远程支持,需要在代码中匿名导入viper/remote这个包。
import _ "github.com/spf13/viper/remote"
Viper将读取从Key/Value存储(例如etcd或Consul)中的路径检索到的配置字符串(如JSON、TOML、YAML、HCL、envfile和Java properties格式)。这些值的优先级高于默认值,但是会被从磁盘、flag或环境变量检索到的配置值覆盖。(译注:也就是说Viper加载配置值的优先级为:磁盘上的配置文件>命令行标志位>环境变量>远程Key/Value存储>默认值。)
Viper使用crypt从K/V存储中检索配置,这意味着如果你有正确的gpg密匙,你可以将配置值加密存储并自动解密。加密是可选的。
你可以将远程配置与本地配置结合使用,也可以独立使用。
crypt有一个命令行助手,你可以使用它将配置放入K/V存储中。crypt默认使用在http://127.0.0.1:4001的etcd。
$ go get github.com/bketelsen/crypt/bin/crypt
$ crypt set -plaintext /config/hugo.json /Users/hugo/settings/config.json
确认值已经设置:
$ crypt get -plaintext /config/hugo.json
远程Key/Value存储实例-未加密
etcd
viper.AddRemoteProvider("etcd", "http://127.0.0.1:4001","/config/hugo.json")
viper.SetConfigType("json") // 因为在字节流中没有文件扩展名,所以这里需要设置下类型。支持的扩展名有 "json", "toml", "yaml", "yml", "properties", "props", "prop", "env", "dotenv"
err := viper.ReadRemoteConfig()
Consul
你需要 Consul Key/Value存储中设置一个Key保存包含所需配置的JSON值。例如,创建一个keyMY_CONSUL_KEY将下面的值存入Consul key/value 存储:
{
    "port": 8080,
    "hostname": "liwenzhou.com"
}
viper.AddRemoteProvider("consul", "localhost:8500", "MY_CONSUL_KEY")
viper.SetConfigType("json") // 需要显示设置成json
err := viper.ReadRemoteConfig()

fmt.Println(viper.Get("port")) // 8080
fmt.Println(viper.Get("hostname")) // liwenzhou.com
viper.AddRemoteProvider("firestore", "google-cloud-project-id", "collection/document")
viper.SetConfigType("json") // 配置的格式: "json", "toml", "yaml", "yml"
err := viper.ReadRemoteConfig()
远程Key/Value存储实例-加密
viper.AddSecureRemoteProvider("etcd","http://127.0.0.1:4001","/config/hugo.json","/etc/secrets/mykeyring.gpg")
viper.SetConfigType("json") // 因为在字节流中没有文件扩展名,所以这里需要设置下类型。支持的扩展名有 "json", "toml", "yaml", "yml", "properties", "props", "prop", "env", "dotenv"
err := viper.ReadRemoteConfig()
监控etcd中的更改-未加密
// 或者你可以创建一个新的viper实例
var runtime_viper = viper.New()

runtime_viper.AddRemoteProvider("etcd", "http://127.0.0.1:4001", "/config/hugo.yml")
runtime_viper.SetConfigType("yaml") // 因为在字节流中没有文件扩展名,所以这里需要设置下类型。支持的扩展名有 "json", "toml", "yaml", "yml", "properties", "props", "prop", "env", "dotenv"

// 第一次从远程读取配置
err := runtime_viper.ReadRemoteConfig()

// 反序列化
runtime_viper.Unmarshal(&runtime_conf)

// 开启一个单独的goroutine一直监控远端的变更
go func(){
    for {
        time.Sleep(time.Second * 5) // 每次请求后延迟一下

        // 目前只测试了etcd支持
        err := runtime_viper.WatchRemoteConfig()
        if err != nil {
            log.Errorf("unable to read remote config: %v", err)
            continue
        }

        // 将新配置反序列化到我们运行时的配置结构体中。你还可以借助channel实现一个通知系统更改的信号
        runtime_viper.Unmarshal(&runtime_conf)
    }
}()
从Viper获取值
- Get(key string) : interface{}
- GetBool(key string) : bool
- GetFloat64(key string) : float64
- GetInt(key string) : int
- GetIntSlice(key string) : []int
- GetString(key string) : string
- GetStringMap(key string) : map[string]interface{}
- GetStringMapString(key string) : map[string]string
- GetStringSlice(key string) : []string
- GetTime(key string) : time.Time
- GetDuration(key string) : time.Duration
- IsSet(key string) : bool
- AllSettings() : map[string]interface{}
需要认识到的一件重要事情是,每一个Get方法在找不到值的时候都会返回零值。为了检查给定的键是否存在,提供了IsSet()方法。
viper.GetString("logfile") // 不区分大小写的设置和获取
if viper.GetBool("verbose") {
    fmt.Println("verbose enabled")
}
获取嵌套的值
GetString("datastore.metric.host") // (返回 "127.0.0.1")
这遵守上面建立的优先规则;搜索路径将遍历其余配置注册表,直到找到为止。(译注:因为Viper支持从多种配置来源,例如磁盘上的配置文件>命令行标志位>环境变量>远程Key/Value存储>默认值,我们在查找一个配置的时候如果在当前配置源中没找到,就会继续从后续的配置源查找,直到找到为止。)
例如,在给定此配置文件的情况下,datastore.metric.host和datastore.metric.port均已定义(并且可以被覆盖)。如果另外在默认值中定义了datastore.metric.protocol,Viper也会找到它。
然而,如果datastore.metric被直接赋值覆盖(被flag,环境变量,set()方法等等…),那么datastore.metric的所有子键都将变为未定义状态,它们被高优先级配置级别“遮蔽”(shadowed)了。
最后,如果存在与分隔的键路径匹配的键,则返回其值。
{
    "datastore.metric.host": "0.0.0.0",
    "host": {
        "address": "localhost",
        "port": 5799
    },
    "datastore": {
        "metric": {
            "host": "127.0.0.1",
            "port": 3099
        },
        "warehouse": {
            "host": "198.0.0.1",
            "port": 2112
        }
    }
}

GetString("datastore.metric.host") // 返回 "0.0.0.0"
提取子树
When developing reusable modules, it's often useful to extract a subset of the configuration and pass it to a module. This way the module can be instantiated more than once, with different configurations.
从Viper中提取子树。
app:
  cache1:
    max-items: 100
    item-size: 64
  cache2:
    max-items: 200
    item-size: 80
`We could pass the cache name to a module (eg. NewCache(“cache1”)), but it would require weird concatenation for accessing config keys and would be less separated from the global config.
So instead of doing that let’s pass a Viper instance to the constructor that represents a subset of the configuration:`
subv := viper.Sub("app.cache1")
if cache1Config == nil { // Sub returns nil if the key cannot be found
    panic("cache configuration not found")
}

cache1 := NewCache(cache1Config)
subv现在代表:
max-items: 100
item-size: 64
func NewCache(cfg *Viper) *Cache {...}
它基于subv格式的配置信息创建缓存。现在,可以轻松地分别创建这两个缓存
cfg1 := viper.Sub("app.cache1")
cache1 := NewCache(cfg1)

cfg2 := viper.Sub("app.cache2")
cache2 := NewCache(cfg2)
反序列化
你还可以选择将所有或特定的值解析到结构体、map等。
有两种方法可以做到这一点:
Unmarshal(rawVal interface{}) : errorUnmarshalKey(key string, rawVal interface{}) : error
type config struct {
    Port int
    Name string
    PathMap string `mapstructure:"path_map"`
}

var C config

err := viper.Unmarshal(&C)
if err != nil {
    t.Fatalf("unable to decode into struct, %v", err)
}
如果要解析键本来包含.的配置,需要修改分隔符
“`v := viper.NewWithOptions(viper.KeyDelimiter(“::”))“`
v := viper.NewWithOptions(viper.KeyDelimiter("::"))
v.SetDefault("chart::values", map[string]interface{}{
    "ingress": map[string]interface{}{
        "annotations": map[string]interface{}{
            "traefik.frontend.rule.type":                 "PathPrefix",
            "traefik.ingress.kubernetes.io/ssl-redirect": "true",
        },
    },
})
type config struct {
    Chart struct{
        Values map[string]interface{}
    }
}
var C config
v.Unmarshal(&C)
viper解析到嵌入的结构体
/*
Example config:

module:
    enabled: true
    token: 89h3f98hbwf987h3f98wenf89ehf
*/
type config struct {
    Module struct {
        Enabled bool

        moduleConfig `mapstructure:",squash"`
    }
}

// moduleConfig could be in a module specific package
type moduleConfig struct {
    Token string
}

var C config

err := viper.Unmarshal(&C)
if err != nil {
    t.Fatalf("unable to decode into struct, %v", err)
}
Viper uses github.com/mitchellh/mapstructure under the hood for unmarshaling values which uses mapstructure tags by default.
Viper在后台使用github.com/mitchellh/mapstructure来解析值,其默认情况下使用mapstructuretag。
当viper读取的配置反序列到我们定义的结构体变量中时,一定要使用mapstructure
序列化成字符串
可能需要将viper中保存的所有设置序列化到一个字符串中,而不是将它们写入到一个文件中。你可以将自己喜欢的格式的序列化器与AllSettings()返回的配置一起使用。
import (
    yaml "gopkg.in/yaml.v2"
    // ...
)

func yamlStringSettings() string {
    c := viper.AllSettings()
    bs, err := yaml.Marshal(c)
    if err != nil {
        log.Fatalf("unable to marshal config to YAML: %v", err)
    }
    return string(bs)
}
使用demo
package main

import (
    "fmt"
    "github.com/fsnotify/fsnotify"
    "github.com/spf13/viper"
)

type Config struct {
    Resp
}

type ConfigMap struct {
}

func main() {
    // 设置默认值
    viper.SetDefault("fileDir", "./")
    viper.SetConfigName("config")         // 配置文件名称中没有扩展名
    viper.SetConfigType("yaml")           // 如果配置文件没有扩展名,这需要配置此项
    viper.AddConfigPath("./")             // 查找配置文件所在路径
    viper.AddConfigPath("$HOME/.appname") // 多次调用以添加多个搜索路径
    viper.AddConfigPath(".")              // 还可以在工作目录中添加配置
    err := viper.ReadInConfig()           // 查找并读取配置文件
    if err != nil {
        //panic(fmt.Errorf("fatal error config file:%s \n", err))
        if _, ok := err.(viper.ConfigFileNotFoundError); ok { // 类型断言,看是不是文件没找到的错误
            // 配置文件找不到
        } else {
            // 其他错误

        }
    }
    // 从配置文件读取值
    resp := viper.Get("resp")
    fmt.Println(resp)

    // 访问嵌套的值(Viper可以通过传入.分隔的路径来访问嵌套字段)
    url := viper.GetStringMap("data.list")
    fmt.Println(url)

    // 访问嵌套的值
    url1 := viper.GetString("data.list.url1")
    fmt.Println(url1)

    // 实时监控配置文件的变化,有变化就执行回调函数
    viper.WatchConfig() // 实时监控配置文件的变化
    viper.OnConfigChange(func(e fsnotify.Event) {
        // 配置文件变化后回调用的回调函数
        fmt.Println("config file changed:", e.Name)
    })
}
使用结构体变量保存配置信息
<!>mapstructure注意<>
package main

import (
    "fmt"
    "net/http"

    "github.com/fsnotify/fsnotify"

    "github.com/gin-gonic/gin"
    "github.com/spf13/viper"
)

type Config struct {
    Port    int    `mapstructure:"port"`
    Version string `mapstructure:"version"`
}

var Conf = new(Config)

func main() {
    viper.SetConfigFile("./conf/config.yaml") // 指定配置文件路径
    err := viper.ReadInConfig()               // 读取配置信息
    if err != nil {                           // 读取配置信息失败
        panic(fmt.Errorf("Fatal error config file: %s \n", err))
    }
    // 将读取的配置信息保存至全局变量Conf
    if err := viper.Unmarshal(Conf); err != nil {
        panic(fmt.Errorf("unmarshal conf failed, err:%s \n", err))
    }
    // 监控配置文件变化
    viper.WatchConfig()
    // 注意!!!配置文件发生变化后要同步到全局变量Conf
    viper.OnConfigChange(func(in fsnotify.Event) {
        fmt.Println("配置文件已修改")
        if err := viper.Unmarshal(Conf); err != nil {
            panic(fmt.Errorf("unmarshal conf failed, err:%s \n", err))
        }
    })

    r := gin.Default()
    // 访问/version的返回值会随配置文件的变化而变化
    r.GET("/version", func(c *gin.Context) {
        c.String(http.StatusOK, Conf.Version)
    })

    if err := r.Run(fmt.Sprintf(":%d", Conf.Port)); err != nil {
        panic(err)
    }
}